Tired of Saggy Glutes and Lower Back Pain? Discover the Power of the Hip Bridge!
Do you notice your glutes losing their lift? Does prolonged sitting leave your lower back feeling stiff and achy? If you’re new to fitness, the Hip Bridge (or Glute Bridge) is a simple yet incredibly effective exercise you can do right on your floor at home.
This exercise uses just your bodyweight to efficiently target your glutes and hamstrings, requiring only a small amount of space. It’s perfect for home workouts, especially if you’re not a fan of intense exercise or are too busy for the gym.
In this guide, we’ll cover why the Hip Bridge is fantastic for shaping your glutes and improving posture, how to perform it with perfect form to prevent injury, and even introduce a cutting-edge method using your smartphone’s AI camera to dramatically boost your home training results!
Why the Hip Bridge is Your Go-To Exercise: Toning Glutes and Improving Posture
Personal trainers and physical therapists highly recommend the Hip Bridge for good reason. Here are its key benefits:
Pinpoint Muscle Activation: Glutes and Hamstrings
The primary advantage of the Hip Bridge is its ability to simultaneously and precisely target the gluteus maximus (the largest glute muscle) and the hamstrings on the back of your thighs.
Ever done squats and felt them mostly in your quads, leading to thicker front thighs? The Hip Bridge minimizes this risk, helping you achieve a beautifully sculpted rear with high, firm glutes and sleek, toned hamstrings.
Correcting Pelvic Tilt for Back Pain Relief and Better Posture
Your glute muscles act as the foundation supporting your pelvis. When these muscles weaken from prolonged sitting, the pelvis can tilt, leading to an arched lower back (swayback) or a rounded upper back (kyphosis). This is a common cause of chronic lower back pain.
By correctly activating your glutes with the Hip Bridge, you can stabilize your pelvis, naturally improve your posture, and reduce unnecessary strain on your lower back, helping to prevent and alleviate pain. *(Note: If you have severe back pain, please consult a doctor or specialist before starting any exercise program.)*
Maximize Results and Prevent Injury: The Correct Hip Bridge Technique
While the Hip Bridge is a simple movement, incorrect form can reduce its effectiveness and even lead to back pain. Let’s master the right steps and key points!
The Basic Hip Bridge Form (4 Steps)
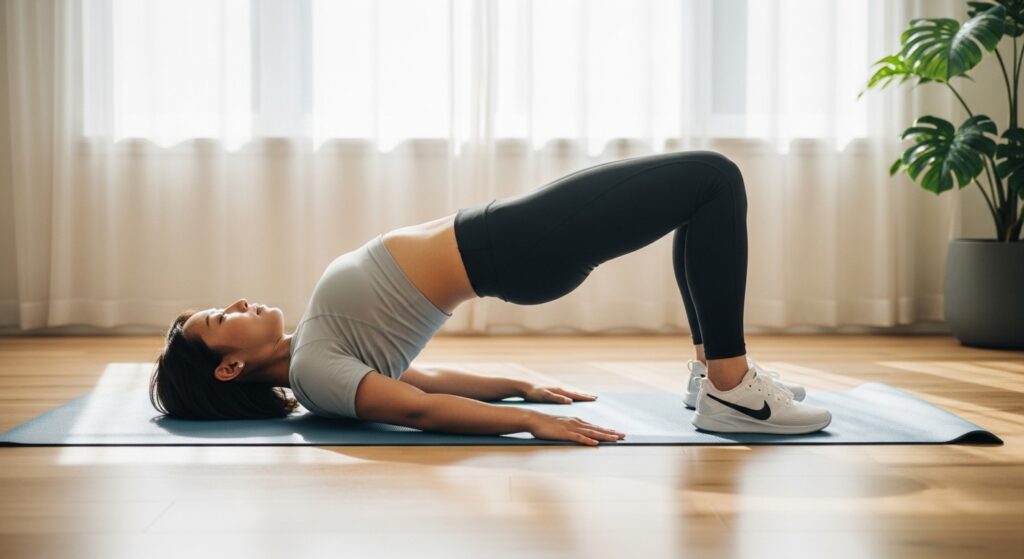
- Lie on your back: Lie flat on a yoga mat or comfortable surface with your knees bent at about a 90-degree angle. Position your feet hip-width apart, with your soles flat on the floor. Let your arms rest naturally by your sides.
- Lift your hips: Exhale and push through the soles of your feet, especially your heels, to slowly lift your hips off the floor.
- Hold at the top: Continue lifting until your body forms a straight line from your shoulders to your knees. Squeeze your glutes at the top and hold for 1-2 seconds.
- Lower slowly: Inhale as you slowly and controllably lower your hips back down, stopping just before they touch the floor.
Aim for 10-15 repetitions for 3 sets.
Common Mistakes (‘NG’ Form) and 3 Solutions
- Over-arching your lower back (Causes back pain): The most common error is arching your back too much to lift your hips higher. Keep your core lightly engaged and think about slightly tilting your pelvis backward (tucking) as you lift.
- Knees caving inward or outward: If your knees shift during the movement, the load won’t be distributed evenly to your glutes. Ensure your knees and toes are always pointing straight ahead.
- Toes lifting off the floor: If your toes lift, the focus shifts too much to your hamstrings. Keep your heels firmly planted and imagine pushing the floor away with your entire foot, with an emphasis on your heels.
AI-Powered Home Training with OrionFit: Optimize Pelvic Tilt and Knee Angle
Unsure if your hips are level? Tend to rush reps instead of holding the position? These common home workout challenges can be solved instantly with OrionFit, an app that uses your smartphone’s AI camera to guide your bodyweight exercises.
Your Smartphone AI Camera Becomes Your Personal Trainer
Simply lie down in front of your phone’s camera, and OrionFit’s AI visually tracks your joint movements, pelvic tilt, and knee angles.
You might think you’re lifting your hips straight, but the AI camera can reveal if you’re not lifting high enough or if your pelvis is tilted. *(Note: OrionFit’s AI camera recognizes when a target angle is reached for rep counting, not for precise form analysis. Use it as a tool to monitor your movements.)*
Efficient Hip Bridge Workouts with OrionFit
- Set up your phone: Position your phone horizontally on the floor or a low stand so it captures your entire body from head to knees.
- Automatic Rep Counting: Start the Hip Bridge routine in OrionFit. The AI automatically counts a rep only when your pelvis reaches the correct height (straight line). This ensures quality reps, not just quantity.
- Workout Scoring: After your workout, you’ll receive a score based on factors like angle stability and movement rhythm. Aim for a high score in this gamified experience to stay motivated.
- AI Personal Advice (Pro Plan): For enhanced results, consider the Pro plan. Based on your workout data, you’ll get personalized AI feedback like